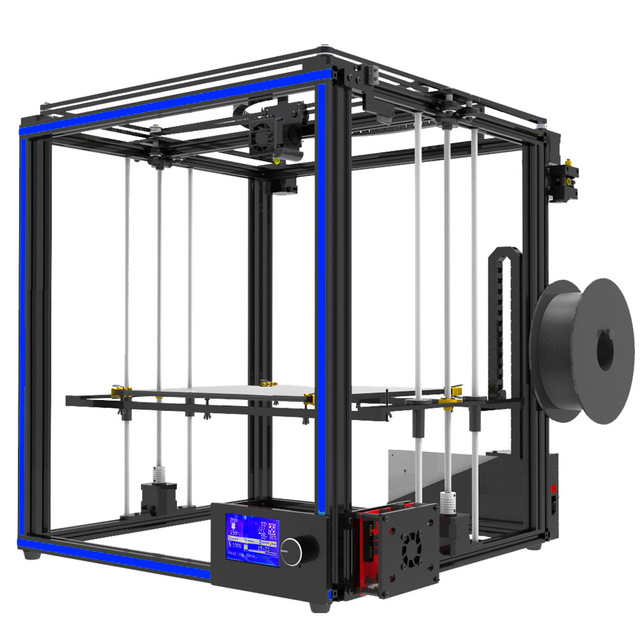
Today I’m writing about my experiences with the Tronxy X5S Large Format 3D printer. Boasting a build volume of 330 mm X 330 mm X 400 mm at a price of only $280, it’s quickly becoming quite popular and seems like quite a bargain. Is it really worth it? Here’s what I discovered as I unpacked and assembled my new 3D printer.
As I do with any kit I buy from China, the first thing I did was a quick inventory. I have never had a shipment that did not have missing parts. Normally I’m short a few screws, nuts or bolts, but occasionally I’ll be missing something more important. This, unfortunately, was one of those cases. The acrylic plate designed to hold the micro switches for the Y-axis and Z-axis end stops was not in the box. Oddly, in its place were extra acrylic bits that I had absolutely no use for, like a spare Z-axis motor mount and a drag chain mounting tab. This didn’t set me back too far, though. I was able to 3D print a new one that actually fit the printer better than the original. I had read reports that the original acrylic plate would interfere with the motion of the printer itself, but never got to test this for myself since it was not included in the package.
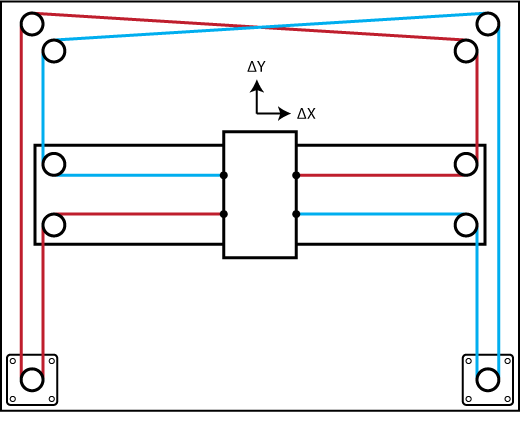
The first thing I noticed was a huge design flaw with the belt system. The Tronxy X5S is a Core XY style printer. Core XY is a parallel manipulator system. I won’t dive too deep into what that means, but basically both motors remain stationary instead of riding along with the moving parts on the printer. This requires the belts to run in a very particular pattern for the motion of the print head to remain precise.
Pulleys and belt mounting points are arranged in a way to take into account the thickness of the pulleys themselves, keeping the belts exactly parallel to one another on the planes where the print head moves. The belts cross at the front or rear of the system where the angle change will not affect linear motion. In this case, the blue belt/pulley system runs above the red belt/pulley system so they do not interfere with one another when they cross.
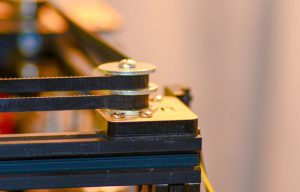
The pulley system on the Tronxy X5S did not look like this.
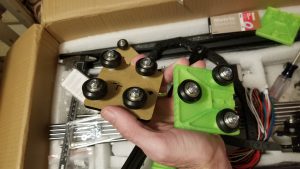
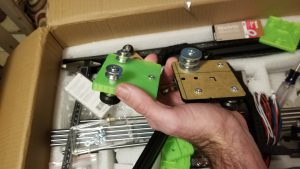
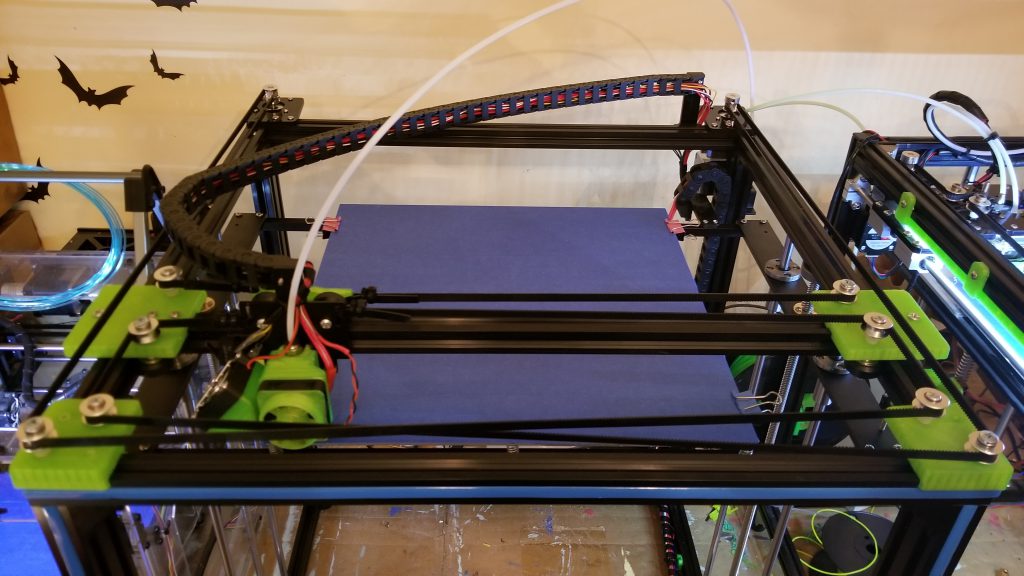
On the original Tronxy X5S, the pulleys are simply stacked on top of one another at the same point. In addition, they’re not truly pulleys. They are roller skate bearings stacked with flat and split washers to make a pulley-like thing. Some of the washers, which are just stamped out of metal sheets when manufactured, have rough edges, which wear on the belts. In the first picture on the left, even with the blur you can pretty clearly see that the belts leaving the pulley are not parallel. They leave the pulley at a number of odd angles. The second picture is the same. It’s blurred, but the belt on the bottom feeds straight back while the belt on the top angles to the left. The picture on the right shows that the belts are all mounted to the print head on the same plane, rather than at four points, causing the belts to angle between the outer pulleys and the print head itself.
Tronxy has already updated their design to change the location of some of the pulleys and add mounting points to the print head. It’s still not perfect, but it’s better. These are shipping on the newer kits coming out of China. The newer kits also come with a nice piece of BuildTak with the Tronxy logo on it for your print bed. If you get your kit from a US warehouse, you may get one of the older ones.
So why does this matter? It comes down to precision. When the belts are completely parallel, as the printer moves on the X and Y axis, the angle of the belt never changes as the moving parts move closer to or further away from the pulleys on the printer. When the angle stays the same, the speed of the motion stays the same. When the belt path is run the “out of the box” way, the angle of the belt becomes more severe the closer the axis moves to the pulley and less severe the further away it is from the pulley. This changes the speed and distance traveled exponentially. It reaches its extreme in the corners of the print area and is barely noticeable in the center. Regardless, I wasn’t going to leave it that way.
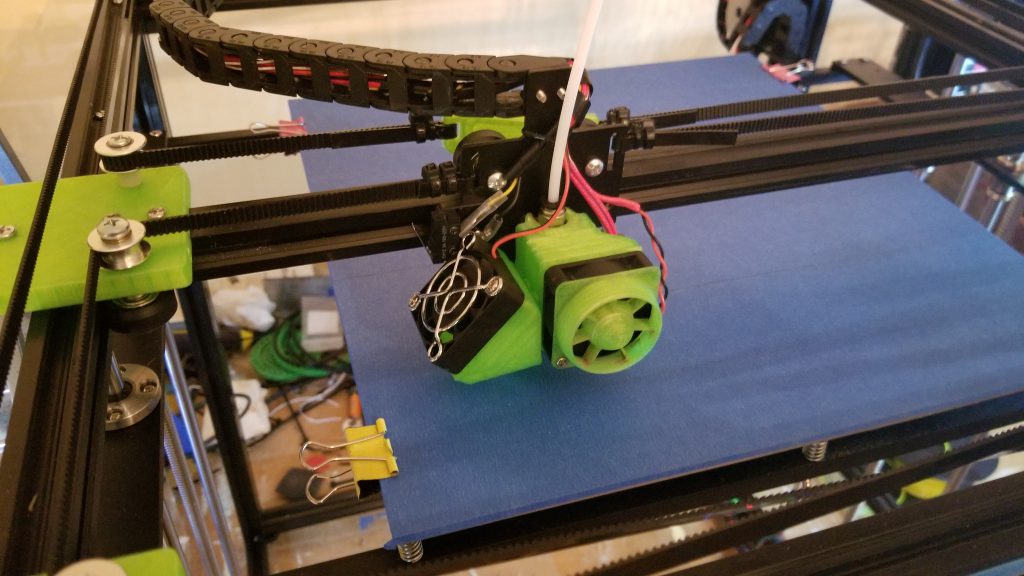
Knowing I probably wasn’t the first person to spot this issue, I did some hunting online. Sure enough, someone had already drawn up the 3D printable parts to correct the belt paths. I fired up my other CoreXY creation and cranked out some neon green ABS replacements.
You’ll notice the new design also eliminates the fourth wheel. It was simply not necessary. The triangular pattern is stronger and the person who designed the new parts stated that they noticed the fourth wheel rarely made contact with the frame anyway. While I was at it, I ordered some REAL pulleys and replaced the junky roller bearing and washer crap that came with the printer.
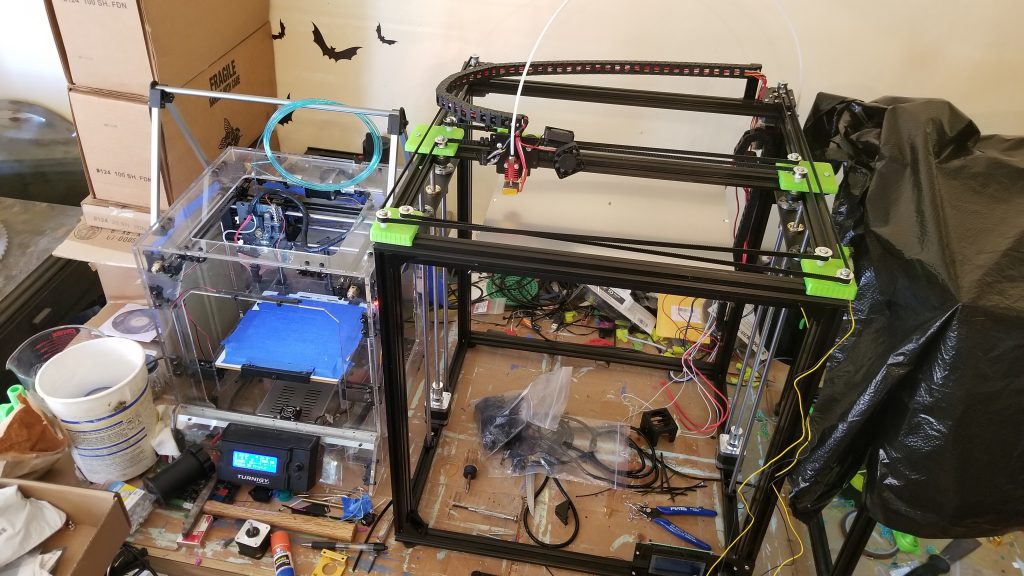
The frame went together rather easily. It’s made from 2020 aluminum extrusions and held together with screws. There are many complaints that the frame twists easily at the joints, so I planned to add corner brackets. I did not, however, install them just yet. I wanted to get all of the electronics and motion pieces in place to make sure the corner brackets did not interfere with anything important before I got too carried away.
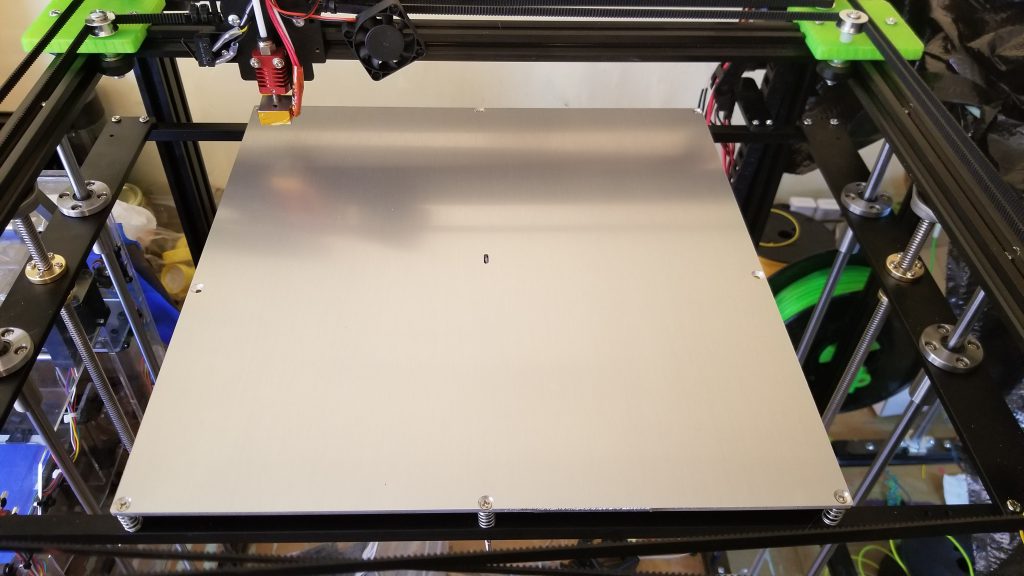
The bed on this thing is pretty big. Not as big as the Creality CR-10 400 and 500 models, but definitely big. It has a 6 point leveling system, which is a little odd. I noticed right away that you have to be very careful not to actually put a bow in the print bed by not tightening them all to the same tension. The aluminum on mine had a rough finish on one edge that was sharp enough to cut me. I took a bit of sandpaper to it to smooth it out. It also came with a sheet of 1/4″ thick fiberglass as a print surface. This was rather unusual. Most of the time you get glass or nothing at all. The fiberglass had a giant hump in it, so it wasn’t remotely flat. The only theory I can come up with is that, since fiberglass is an insulator, Tronxy believed it would help insulate that gigantic heated bed so the electronics wouldn’t have to struggle so much to keep it up to temperature. More on that later.
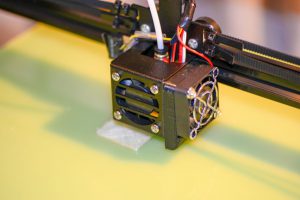
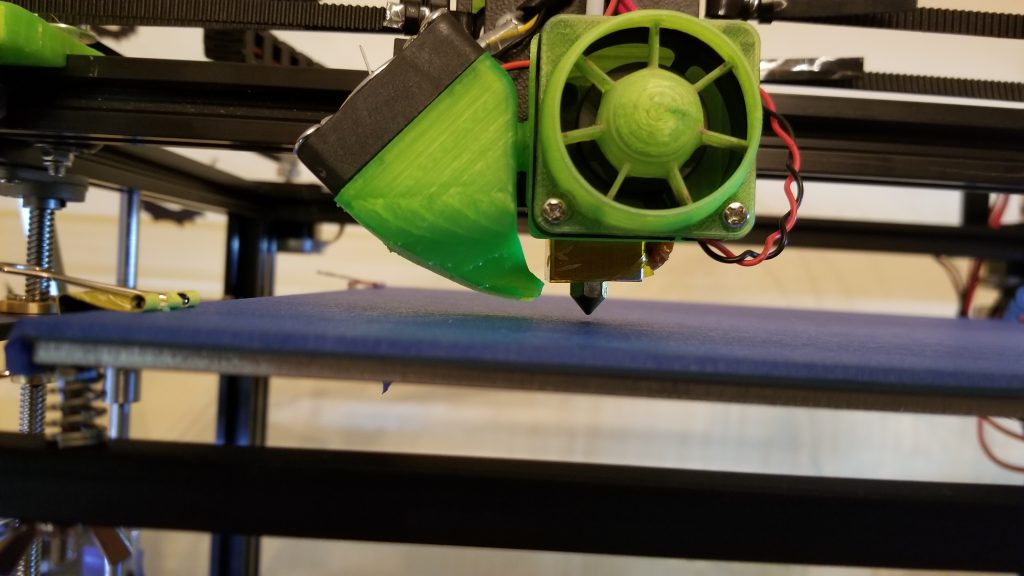
The next issue to tackle was the cooling fan. The metal housing for the hot end cooling fan was not boxed off from the heater block, so it was blowing air across not only the cold break, but the transition zone and the heater block. This can cause heating issues and unwanted drafts. Not so much an issue when printing with PLA, but if you do any work with ABS, it’s going to cause some major warping issues. The other issue was with the part cooling fan. The 3D printed duct that came with the printer did not direct air onto the part, but onto the heater block. Same issue as above. We don’t want to cool the heater block, we want to cool off that hot plastic after it exits the nozzle. The solution was another 3D printed part.
The new hot end fan now has a baffle that keeps air from blowing across the heater block, keeping the cold break cool and allowing the heater block to properly do its job.
The new part cooling fan duct now sweeps under the heater block, directing air onto the part while keeping drafts off the heater.
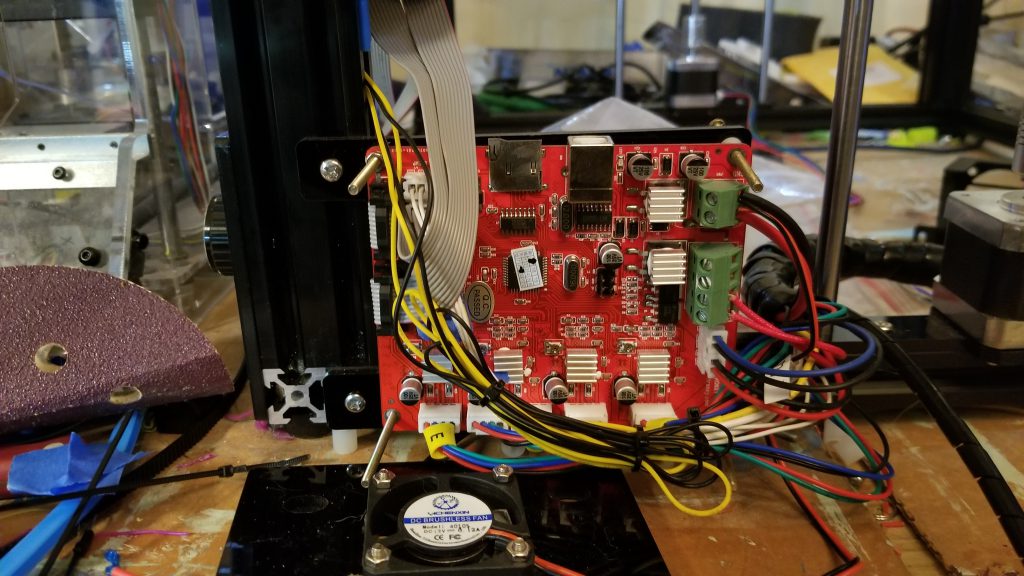
Next came wiring. This actually wasn’t too bad. The cables were all labeled neatly and the instructions clearly showed which plug on the control board was paired with which cable. The only annoyance was the way the control board was mounted. It was basically four long screws with a huge stack of tiny plastic spacers that wanted to fall off and roll all over the place. Once you got everything sandwiched in place, it all held together, but they could have provided long spacers instead of 16 little ones. This was just a cost savings.
While I was at it, I 3D printed a bracket and added a mosfet for the heated bed. The cooling fan is overkill, but it was part of the bracket design and I had a spare fan, so what the heck? If you’re not familiar with this modification, Google it and do it. It will save you a lot of headaches and replacement electronic parts in the future. This also made a later modification much easier for me.
So, it’s together, it’s wired, everything is tightened up.
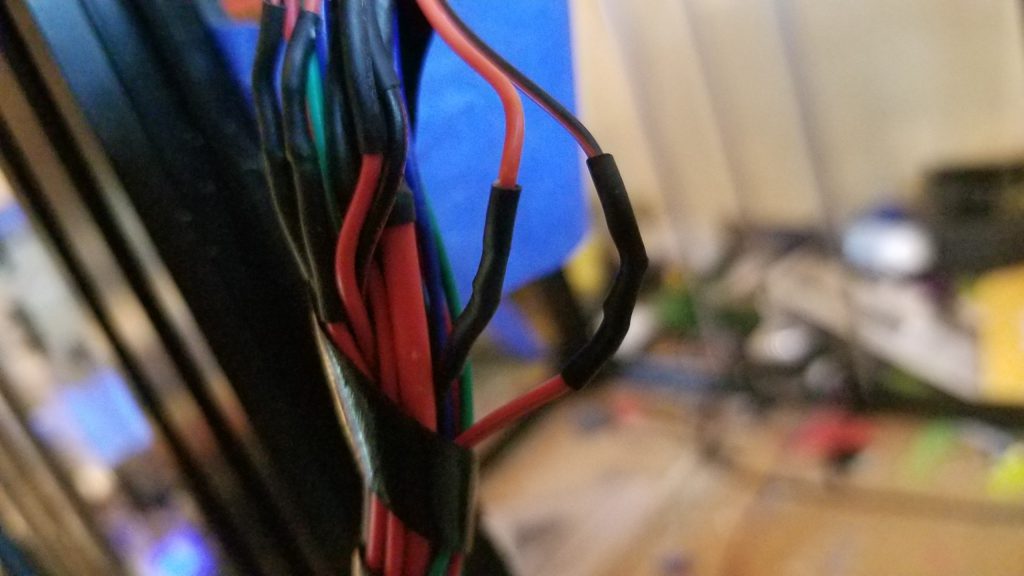
I went ahead and switched it on at this point. Immediately, I hear popping and smoke begins pouring out of the hot end cooling fan. I switched it off immediately. My first thought was that I just got a bad cooling fan. I clipped off the smoked one and soldered a new one in place. I switched the printer on for a split second and back off. The fan didn’t move. I unplugged the fan and plugged it into a different power source for a second. Nothing. I tried a different fan in the plug on the main board. It fired right up. At this point I began questioning the prefab wiring harness that came inside that cable chain. I started looking for splices. Did I ever find one.
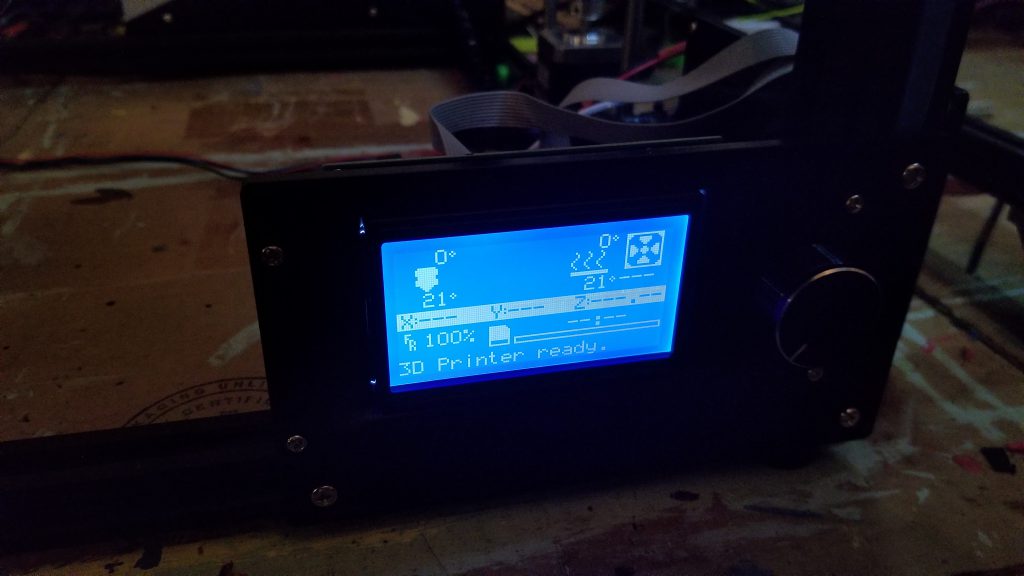
The last time I checked, polarity mattered on these brushless DC cooling fans and red should go to red, black to black. This was a pretty unacceptable screw up. Instead of tearing apart the shrink tubing and solder joints in the splice, I ended up reversing the pins in the connector. After that, the fan operated as expected. I switched everything back on and the LCD lit up. Everything was ready to roll. I gave it a quick bed level and was ready for a test print.
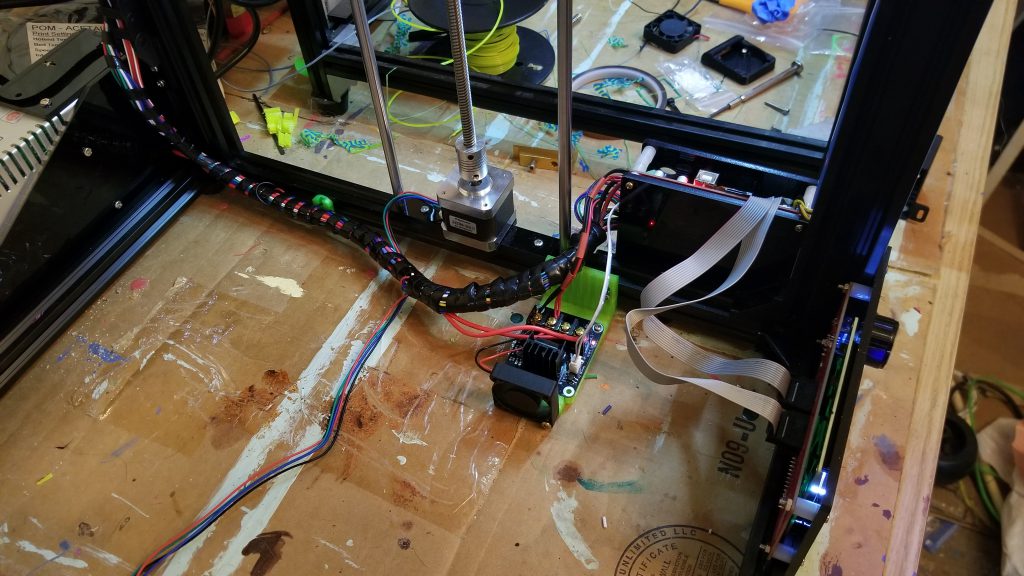
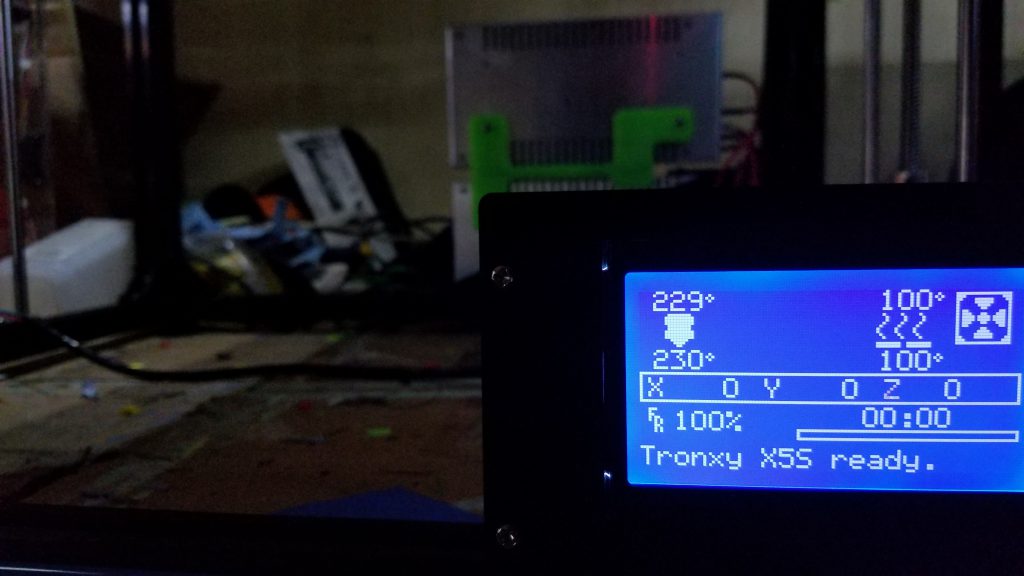
I selected “Preheat PLA” from the menu and was immediately puzzled. 40 degrees C for the heated bed? That’s a bit low. Most of the printers out there heat to around 60 or 70 degrees C. I manually set the temperature to 70 degrees. After a few minutes, “HEATER ERROR”. Well…..that’s nice. Long story short, the printer is incredibly underpowered. If you take into account the length of the traces on the heated bed and do a little math, you determine that in order to operate most efficiently it would require between 20 and 22 volts. This printer uses a 12 volt power supply. 12 volt power supplies work fine for most 3D printers with much smaller beds. Some printers with larger beds even use 120 volt AC silicone heater mats to more efficiently warm up. My other coreXY printer uses one and it works great. In order to overcome this issue, I added a second power supply. The 12 volt power supply supplies power to the main control board and the stepper motors while the 24 volt power supply, regulated down to 21 volts, powers only the heated bed. The mosfet I added allows me to easily use the two power supplies together without having to add a bunch of voltage regulators or UBEC systems to prevent over voltage. I also upgraded the firmware on the printer to Marlin 1.1.8 and added a piece of borosilicate glass to the bed to eliminate the fiberglass sheet. I can now easily reach 100 degrees C on my heated bed and print ABS if I want to.
Despite the issues, I’m pleased with the printer overall. It gave me an inexpensive base to work with that, even with money spent on upgrades, was way less expensive than alternatives around the same build volume. Print quality is actually pretty great with the pulley upgrades. There are still a couple negatives that I need to overcome. One issue is the placement of the Z-axis limit switch. Normally, these switches are located on the same side of the machine as the nozzle. In a situation with two Z-axis motors, if they get out of time and the nozzle side is significantly higher than the other side, it will still trip the limit switch before drilling the nozzle into the bed. On the Tronxy, the limit switch is on the side opposite the nozzle. Given the size of the bed, the Z-axis motors get out of time OFTEN. The slightest amount of pressure while removing a part from the platform causes the motors to spin. If the nozzle side ends up higher, the nozzle digs into the bed when homing, causing the Z-axis motors to sit there and grind until the vibration finally trips the switch (or a human intervenes). Future plans are to relocate the switch and find a better way to keep the two Z-axis motors in time with one another.
Would I recommend this printer to you? That all depends on your skill level. If you’re good at tinkering, flashing sketches to Arduino, soldering, etc, go for it. You’ll have fun getting this thing set up. If you just want something you can take out of the box, pop together and go, this is not the printer for you. It’s not a beginner printer, but I wouldn’t call it overly advanced either. It just requires some finesse to get it where it needs to be.
2 thoughts on “The Tronxy X5S Large Format 3D Printer”
I was considering one of these, but your excellent review changed my mind. Each of the fixes you suggest are excellent, but they also show me the printer isn’t right for a complete noob like me.
Do you have a link to the STL for the belt system and for the cooling fan?
Else it looks like we did a similar journey. I also switched the board to an SKR1.4, the hotend to a Micro Swiss all metal hotend and the extruder to a Bondtech BMG.
Also I am running my Z motors on one stepper driver each. Which means I can use a BL Touch to home both Z axis independently to get an even bed.